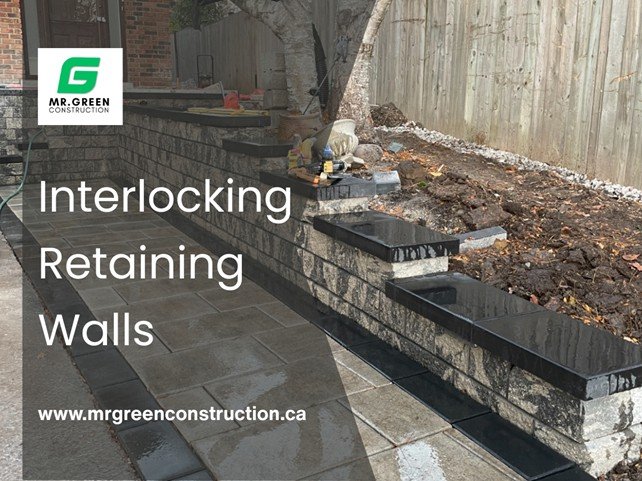
Day: October 11, 2025

  • Tree Trimming Richmond Hill Homeowners Can Trust

    Tree Trimming Richmond Hill Homeowners Can Trust

    Summary

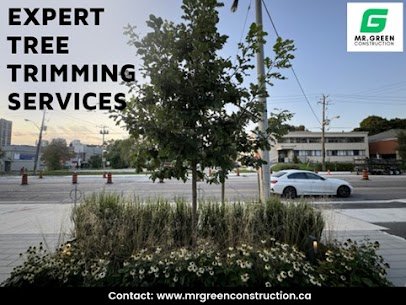
    Healthy, well-shaped trees add life, structure, and shade to any property. However, without proper care, they can quickly become safety hazards or lose their natural beauty. Professional maintenance keeps your trees strong and vibrant while protecting your home and garden. Homeowners who invest in tree trimming services notice immediate improvements in both safety and appearance. For those seeking reliable Tree Trimming Richmond Hill experts, understanding the importance of seasonal care, proper techniques, and professional guidance is the first step toward maintaining a balanced and beautiful landscape.

    Why Tree Trimming Is So Important

    Trees are among the most valuable features of your outdoor space. They provide shade, clean the air, and improve property value. Yet, like any living thing, they require attention. Regular trimming helps them grow evenly, stay healthy, and avoid potential damage to nearby structures.

    Tree trimming services are not just about appearance. Trimming prevents branches from becoming too heavy or overextended. When left unchecked, they can break during storms, damaging roofs, vehicles, or power lines. A well-trimmed tree distributes its weight evenly and develops stronger branches that can withstand weather changes.

    Pruning also improves air circulation and sunlight penetration, which supports overall growth and helps prevent disease. A good trim can even encourage new flowering or fruit-bearing in certain tree species. In short, trimming is essential maintenance that benefits both safety and plant health.

    Signs Your Trees Need Trimming

    You don’t have to wait until a branch breaks to know your tree needs attention. These signs are clear indicators that trimming is overdue:

    1. Low-hanging branches that obstruct walkways or block driveways.
    2. Dead or brittle limbs that could fall at any time.
    3. Overgrown branches touching roofs or power lines.
    4. Unbalanced growth, where one side of the tree looks heavier.
    5. Dense canopies that block light from reaching grass or garden beds.
    6. Visible cracks or splits in large branches.

    If you notice one or more of these, it’s time to schedule a professional assessment. Proper trimming can prevent accidents and promote steady, healthy growth throughout the year.

    How Tree Trimming Improves Safety and Aesthetics

    Tree trimming contributes to more than curb appeal. It protects your home and family from potential hazards. Overextended branches pose risks during storms, especially in areas with high winds or heavy snow. Regular maintenance removes those risks before they turn into costly repairs.

    From a design perspective, trimming defines shape and proportion. Well-maintained trees complement landscaping features and frame the house beautifully. Whether you prefer a natural look or a more manicured layout, trimming creates balance and keeps everything looking intentional.

    Some trees also respond better to trimming at specific times of the year. Early spring or late winter often works best for most species since it allows wounds to heal before growth season begins. Working with professionals ensures timing and technique are both appropriate for the specific trees in your yard.

    The Right Way to Trim Trees

    Trimming is a skilled task that requires understanding where and how to cut. Too much trimming can weaken a tree, while trimming in the wrong places can lead to uneven growth.

    Professional arborists typically follow these key steps:

    1. Assessment: Evaluate the tree’s health, size, and surrounding environment.
    2. Removal of Deadwood: Clear away any damaged or diseased limbs to prevent decay.
    3. Shaping and Thinning: Focus on improving structure without removing too much foliage.
    4. Safety Clearance: Ensure branches don’t interfere with roofs, fences, or power lines.
    5. Final Inspection: Review for symmetry, stability, and proper distribution of weight.

    These careful steps ensure trees remain healthy while reducing the risk of accidents or structural imbalance.

    Benefits of Professional Tree Trimming Services

    Hiring professionals brings long-term advantages that go beyond a clean appearance.

    1. Improved Health: Professionals identify diseases or infestations early and remove infected sections.
    2. Longevity: Regular trimming extends the lifespan of trees by encouraging healthy regrowth.
    3. Stronger Branches: Proper cuts guide the tree to grow evenly and withstand storms better.
    4. Better Sunlight Distribution: Trimming allows light to reach all parts of the tree and nearby plants.
    5. Increased Property Value: A well-maintained yard contributes to a strong first impression.
    6. Time Savings: Professionals handle heavy equipment safely and efficiently.

    In short, expert trimming maintains both safety and aesthetics without risking the tree’s long-term health.

    Choosing a Reliable Tree Trimming Company

    Selecting the right team matters. A professional service should have the skills, equipment, and safety standards needed for any type of trimming work. When comparing options, keep these points in mind:

    • Training and Certification: Certified arborists understand how different species react to trimming.
    • Proper Insurance: Always confirm that the company carries insurance for worker and property protection.
    • Transparent Pricing: Estimates should be clear and based on the job’s complexity, not vague hourly rates.
    • Safety Standards: A reliable crew uses proper harnesses, ladders, and pruning tools.
    • Local Knowledge: Companies familiar with regional tree types and climate patterns deliver better results.

    Mr. Green Construction follows all these best practices to ensure every tree trimming project is handled safely and efficiently.

    Common Mistakes to Avoid When Trimming Trees

    While trimming may look straightforward, it is easy to make mistakes that affect a tree’s long-term health. Avoiding these errors helps maintain strong and attractive trees:

    • Topping: Cutting large branches from the top of a tree may stunt growth and cause decay.
    • Cutting Too Close to the Trunk: This damages healing tissue and leaves the tree vulnerable to infection.
    • Over-Trimming: Removing too much foliage limits the tree’s ability to produce nutrients through photosynthesis.
    • Using Dull Tools: Jagged cuts take longer to heal and increase the risk of disease.
    • Ignoring Timing: Pruning at the wrong time can disrupt blooming or slow regrowth.

    A skilled team knows how to avoid these issues, ensuring the trees stay balanced and vibrant throughout every season.

    Simple Tree Care Tips for Homeowners

    Even between professional visits, small steps can help keep your trees in good shape.

    1. Water deeply, especially during dry months, to encourage strong root systems.
    2. Mulch around the base to retain moisture and prevent weed competition.
    3. Avoid piling soil or mulch directly against the trunk, which can lead to rot.
    4. Watch for signs of disease such as discolored leaves or unusual insects.
    5. Schedule seasonal inspections to catch problems before they worsen.

    These habits help your trees stay strong and resilient year after year.

    Frequently Asked Questions

    Q1. How often should trees be trimmed?
    A1. Most mature trees benefit from trimming every two to three years. Younger trees may need annual shaping to establish a stable structure.

    Q2. Is there a specific season for tree trimming?
    A2. Late winter or early spring is ideal for most species. However, dead or hazardous branches should be removed anytime for safety.

    Q3. Can trimming help prevent storm damage?
    A3. Yes. Removing weak or overextended branches reduces the risk of breakage during high winds or heavy snow.

    Q4. Will trimming affect blooming or fruit production?
    A4. When done correctly, trimming encourages healthier flowering and fruiting by directing energy to strong, productive branches.

    Q5. Can I trim my own trees?
    A5. Small branches can be managed safely, but large trees or high branches require professional tools and expertise to prevent injury or damage.

    Tree Trimming That Protects and Beautifies Your Property

    Regular trimming keeps your trees healthy, your yard safe, and your home looking well cared for. It’s an essential part of maintaining a property that feels inviting and natural. A professional team can manage the balance between beauty and safety while respecting the natural growth of your trees.

    For homeowners looking for dependable Tree Trimming services in Richmond Hill, Mr. Green Construction provides careful, detailed trimming tailored to your property’s needs. Our team prioritizes health, structure, and aesthetics, using proven methods that keep your trees thriving. We help homeowners create outdoor spaces that grow stronger and look better with time. Reach out to Mr. Green Construction to schedule your next trimming service and keep your landscape safe, balanced, and naturally beautiful throughout the year.

  • Building Strong Gardens with Interlocking Wall Blocks

    Building Strong Gardens with Interlocking Wall Blocks

    Summary

    A well-built garden is more than plants and soil; it’s a balance of structure, design, and stability. Whether you want to prevent erosion, shape your landscape, or add height and texture, retaining walls are essential. Many homeowners choose interlocking retaining wall blocks for their durability and versatility. They lock together without the need for mortar, creating strong walls that last for years. For anyone planning an outdoor makeover or searching for cheap interlocking retaining wall blocks, understanding design choices, installation techniques, and material options is the key to building a garden that is both beautiful and resilient.

    Why Retaining Walls Matter in Garden Design

    Retaining walls do much more than hold soil in place. They define spaces, improve drainage, and bring visual interest to otherwise flat yards. When built properly, these walls create layers that make small gardens appear larger and help prevent soil erosion during heavy rainfall.

    Interlocking retaining wall blocks are one of the most practical solutions for homeowners who want structure without sacrificing style. These blocks are designed to fit together like puzzle pieces, offering both strength and flexibility. They come in a range of sizes, colors, and textures, allowing you to match the design to your home’s architecture or surrounding landscape.

    The interlocking system also makes installation faster and cleaner than traditional masonry. There’s no need for mortar, and each block contributes to the wall’s stability through its own weight and shape. This makes them ideal for creating garden borders, raised beds, terraces, or decorative seating walls.

    How Interlocking Wall Blocks Work

    Each block in an interlocking system has a unique lip or groove that helps it lock securely into place with the blocks above and below it. This connection distributes pressure evenly, reducing stress on the structure and making it more resistant to shifting or cracking.

    The system relies on three main components:

    1. Base Preparation: The foundation must be level and compacted properly. A solid base determines how well the wall will hold over time.
    2. Drainage Management: Gravel and perforated pipes behind the wall help water escape, reducing pressure buildup.
    3. Block Alignment: Proper stacking and alignment ensure the wall stays straight and uniform.

    When each layer is carefully placed, the wall becomes both strong and visually clean. The result is a structure that supports the landscape while blending seamlessly into the garden design.

    Top Benefits of Using Interlocking Wall Blocks

    1. Long-Lasting Strength

    The primary benefit is durability. Because the blocks interlock, they resist shifting caused by soil pressure or seasonal freeze and thaw cycles.

    2. Versatile Design

    From curved garden edges to tiered walls, interlocking blocks adapt to any shape or layout. This flexibility allows creative freedom while maintaining structural stability.

    3. Low Maintenance

    Once installed, interlocking walls require minimal upkeep. They resist cracks, weathering, and pests far better than timber or poured concrete walls.

    4. Improved Drainage

    Gaps and joints between the blocks naturally allow water to pass through, preventing buildup that could weaken the wall.

    5. Cost-Effective Installation

    Because these walls don’t require mortar or heavy machinery, they often cost less to install while providing long-term value.

    6. Aesthetic Appeal

    With multiple colors, textures, and finishes available, interlocking walls complement every style—from rustic gardens to modern outdoor living areas.

    Planning Your Garden Layout

    Before building, it’s important to have a clear idea of how your garden will look. A well-planned layout ensures the wall not only functions effectively but also adds to the overall visual balance of your space.

    1. Identify Slopes and Problem Areas: Start by assessing which parts of your yard need structural support.
    2. Decide on Height and Shape: Low retaining walls are ideal for garden borders, while taller ones help manage elevation changes.
    3. Incorporate Seating or Planting Areas: Adding built-in seating or planter spaces creates both utility and charm.
    4. Blend with Natural Features: Use materials and colors that match the environment for a cohesive look.

    This planning phase sets the foundation for a durable and visually appealing project.

    Installation Tips for Homeowners

    While professionals handle larger projects, smaller garden walls can be a satisfying DIY project with the right preparation. Here’s what to keep in mind:

    • Excavate Carefully: Dig deep enough for a solid gravel base that can handle weight and water flow.
    • Level Each Row: Precision is key. Small misalignments early on can cause issues as the wall grows taller.
    • Add Drainage: A layer of crushed gravel and perforated pipe behind the wall helps release pressure from trapped water.
    • Backfill Properly: Fill behind each layer with gravel for stability. Avoid using only soil, which can expand when wet.
    • Cap the Wall: Use matching capstones on top for a clean, finished appearance.

    If your wall exceeds three feet in height, it’s best to hire professionals who understand soil pressure and building regulations.

    Design Ideas for Garden Walls

    Retaining walls don’t have to look industrial or plain. With interlocking blocks, they can become a design statement.

    • Tiered Gardens: Multiple short walls stacked at different heights create beautiful levels for flowers and shrubs.
    • Raised Flower Beds: Smaller walls define planting areas and improve drainage for delicate plants.
    • Built-In Seating: Flat-topped walls around patios double as benches, saving space and adding function.
    • Curved Pathways: Gentle curves built from interlocking blocks give a natural, flowing appearance.
    • Accent Lighting: Adding soft lights between layers or along the top caps turns walls into stunning nighttime features.

    These creative touches make your outdoor space both practical and personal.

    Maintenance and Longevity

    Once built, interlocking walls require little maintenance, but a few regular checks keep them in top condition:

    • Remove weeds that grow between blocks.
    • Check for any settling and fill gaps if needed.
    • Keep drainage channels clear of debris.
    • Rinse off dirt or stains with mild soap and water.

    A well-built and maintained wall can last for decades, making it one of the best investments for your property’s outdoor appeal.

    Frequently Asked Questions

    Q1. How long do interlocking retaining wall blocks last?
    A1. With proper installation and care, they can last 50 years or more. Their strength depends on base preparation and drainage.

    Q2. Are interlocking walls suitable for all soil types?
    A2. Yes, but sandy or loose soil may need reinforcement through compacting and gravel backfill for added support.

    Q3. Can interlocking walls be built on a slope?
    A3. Absolutely. They’re ideal for sloped yards where soil movement or erosion is common.

    Q4. Do I need a professional to install them?
    A4. Smaller walls under three feet can be a DIY project, but anything taller should be handled by professionals to meet safety standards.

    Q5. How do I choose the right block style?
    A5. Choose blocks that match your home’s exterior and garden design. Most suppliers offer samples to compare textures and colors before purchasing.

    Strong Gardens Start with Smart Planning

    A great garden design combines practicality with beauty. Retaining walls bring order to the landscape, allowing you to create usable spaces and prevent erosion naturally. They frame gardens, define walkways, and add structure without feeling heavy or overbuilt.

    If you want lasting quality and visual appeal, interlocking retaining wall blocks provide the ideal balance between performance and design flexibility. Their modular construction ensures durability while giving your garden a polished finish that grows more charming over time.

    For homeowners looking for affordable options such as cheap interlocking retaining wall blocks, Mr. Green Construction offers professional guidance, top-quality materials, and dependable craftsmanship. Whether you’re planning a garden renovation or a full outdoor redesign, our team helps you choose the right products and build strong, beautiful walls that stand the test of time. Reach out to Mr. Green Construction today to discuss your outdoor goals and discover how the right retaining wall can transform your garden into a lasting feature of your home.